How to dim high voltage LED strips safely? This question deserves more than a dimmer recommendation. High-voltage LED strips connect directly to mains power, unlike familiar 12V or 24V systems. Their insulation, connectors, rectifiers, and dimming method must work together.
Lighting designer David Warfel offers a useful reminder: “Good lighting control begins with understanding the source, not choosing the switch.” That principle matters here. A strip marked 120V or 230V may require a compatible leading-edge or trailing-edge dimmer. Some models accept phase-cut control. Others require a dedicated controller. The wrong device can cause flicker, buzzing, overheating, or early failure.
Check the installation before touching the wiring. Read the manufacturer’s dimming instructions. Confirm the strip voltage, total wattage, minimum dimmer load, and maximum circuit capacity. Leave room for heat to escape. Keep connectors dry and fully enclosed. A residual-current device, or GFCI where required, adds valuable protection.
Do not rely on appearance.
A qualified electrician should verify the circuit, grounding, insulation, and local installation requirements. This is especially important for outdoor channels, long runs, and wet locations. Never cut or modify an energized strip. Switch off power at the breaker, then test that power is absent.
There is also room for honest caution. Even a correctly matched dimmer may produce slight low-level flicker. Different batches can behave differently. A short test section helps reveal problems before a full installation. This guide examines practical dimmer choices, compatibility checks, wiring risks, and safer testing methods for 2026.
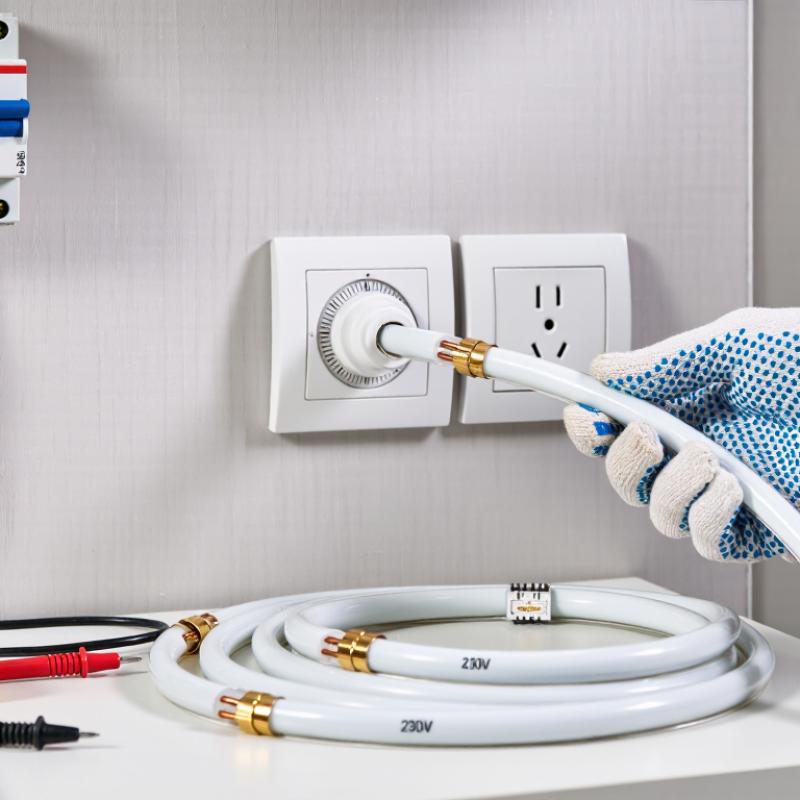
High-voltage LED strip dimming begins with identifying the electrical system, not choosing a knob. Some strips connect directly to mains through an approved power assembly. Others require a constant-voltage driver before dimming. These systems are not interchangeable. A phase-cut dimmer may suit one design, while PWM control may suit another. Check voltage, wattage, dimming method, and minimum load. Do not guess. A flickering strip can indicate incompatibility, overload, or poor wiring.
Safe installation needs more than a compatible dimmer. Select equipment with recognized safety certification and a load rating above the measured strip demand. Allow headroom for startup current and future changes. Protect connections inside suitable enclosures, maintain insulation, and keep heat away from wood, fabric, and blocked channels. Use residual-current protection where required by local rules. Switch power off before inspection. Verify isolation with a proper tester, not a finger. High-voltage circuits deserve a licensed electrician when mains wiring is involved.
During commissioning, run the strip at full brightness for at least thirty minutes. Feel for abnormal heat only from safe, insulated points, and inspect for color shifts or buzzing. Heat leaves clues. My first assumption was that a dimmer would reduce every risk. It did not. Dimming can lower light output while leaving wiring faults untouched. I now record measured load, ambient temperature, and connector locations. That record helps later, although I sometimes wish I had photographed every joint. Recheck local electrical requirements before final installation, because guidance and product ratings can change.
| Dimming Method | Typical Input Voltage | Control Principle | Typical Dimming Range | Main Advantages | Key Limitations | Safety Requirements |
|---|---|---|---|---|---|---|
| Leading-Edge Phase-Cut | 110–120 V AC or 220–240 V AC, depending on the strip and installation | Cuts the beginning of each AC half-cycle using a triac or similar semiconductor device | About 10–100%, subject to load compatibility | Widely available; simple wall-control integration; suitable for compatible resistive or electronic loads | May cause audible noise, flicker, inrush stress, or a higher minimum brightness with some LED strips | Use only a dimmer specifically rated for LED loads and the local mains voltage. Confirm minimum load, maximum load, and compatibility before installation. |
| Trailing-Edge Phase-Cut | 110–120 V AC or 220–240 V AC | Cuts the end of each AC half-cycle, commonly using a MOSFET-based circuit | About 10–100%, depending on the LED strip and dimmer | Often produces smoother operation with electronic LED loads and can reduce audible noise | May have a higher purchase cost; not every high-voltage LED strip accepts trailing-edge control | Verify compatibility with the strip’s internal rectifier and driver. Do not mix dimmer types unless the equipment documentation permits it. |
| Universal Phase-Cut | Typically 110–240 V AC, subject to the product rating | Automatically supports leading-edge, trailing-edge, or selectable phase-cut operation | Commonly about 10–100% | Flexible for mixed installations and useful where the preferred phase-cut method is uncertain | Performance varies by mode; incorrect automatic detection can still result in flicker or poor low-end dimming | Check the actual line-voltage range, load type, minimum load, enclosure requirements, and thermal derating. |
| 0–10 V Control with a Compatible Driver | The LED driver receives mains voltage; the control signal is nominally 0–10 V DC | A low-voltage analog signal commands the driver’s output level | Typically 10–100%; exact minimum depends on the driver | Good control stability; suitable for building automation and commercial lighting systems | Requires a compatible high-voltage LED driver and separate low-voltage control wiring | Keep control wiring separated from mains wiring where required by local electrical codes. Confirm whether the control input is isolated and correctly polarized. |
| PWM Control through a Dedicated High-Voltage Controller | Must match the strip’s rated mains voltage, commonly 110–120 V AC or 220–240 V AC | Rapidly switches the load to control the average light output | Potentially below 10% when the controller and strip are designed for it | Can provide repeatable brightness control and support advanced lighting scenes | High-voltage PWM is not interchangeable with low-voltage 12 V or 24 V PWM equipment; incorrect equipment can create a serious shock or fire hazard | Use a controller explicitly rated for the strip’s voltage, current, switching frequency, and installation environment. Do not connect a low-voltage PWM dimmer directly to a mains strip. |
| Smart or Digital Phase-Cut Dimmer | Usually 110–120 V AC or 220–240 V AC, depending on the model | A digital control interface commands an internal phase-cut dimming circuit | Commonly about 10–100% | Remote scheduling, scene control, and integration with automation systems | Wireless control does not guarantee electrical compatibility; standby power and network reliability may also matter | Treat the output as mains voltage. Use a certified enclosure, proper grounding where applicable, overcurrent protection, and an approved installation method. |
| Inspection Item | Requirement for Safer Dimming |
|---|---|
| Voltage matching | The dimmer, strip, connectors, and enclosure must be rated for the same nominal mains voltage and frequency used at the installation site. |
| Load capacity | Keep the connected load within the dimmer’s rated wattage and current limits, and account for inrush current and thermal derating. |
| Minimum load | Some phase-cut dimmers require a minimum load. An undersized load may cause flicker, dropouts, buzzing, or failure to turn off completely. |
| Cutting and connection | Follow the strip’s marked cutting intervals and use connectors or terminations rated for the full operating voltage. Never leave energized conductors exposed. |
| Protection from contact | Use suitable insulation, end caps, strain relief, and an appropriate enclosure. Flexible high-voltage strip should not be handled while energized. |
| Environmental rating | Select an ingress-protection and temperature rating appropriate for indoor, damp, outdoor, or enclosed locations. Prevent water entry at every joint. |
| Installation and testing | Installation, testing, and modification of mains-voltage lighting should be performed by a qualified person in accordance with applicable electrical codes and local regulations. |
Confirm the strip’s exact voltage, wattage, frequency, and dimming method. A 120-volt strip needs a compatible 120-volt dimmer. A 220–240-volt strip needs suitable protection and certification. Never guess from appearance.
No. These devices use different electrical systems. A mismatch may cause failure, dangerous heat, or unstable lighting. Choose a dimmer designed for the strip’s voltage category.
Check whether the strip supports phase-cut dimming or digital control. Many mains-powered strips require a compatible phase-cut dimmer. The wrong method may create flicker, buzzing, or delayed response.
Calculate the strip’s total wattage, length, and possible inrush current. Leave safety headroom instead of operating continuously at the limit. A small-looking strip can exceed capacity when several sections connect.
Test one short section with the actual dimmer and power source. Check brightness at 10%, 50%, and 100%. Watch for uneven light.Listen for buzzing. Stop if anything seems unusual.
Keep connections dry, enclosed, and accessible for inspection. After thirty minutes, check for unusual warmth around the dimmer and terminals. Narrow cabinets can trap heat. I once underestimated that problem.
Turn off the circuit breaker and verify the wires with a reliable voltage tester. Do not trust the wall switch alone. Use approved connectors, suitable insulation, and a proper enclosure. Ask a qualified electrician to inspect unfamiliar mains wiring.
Raise brightness slowly from the lowest setting. Look for flicker, buzzing, uneven brightness, or excessive warmth. Recheck the load calculation and terminal connections if problems appear. Labels can be incomplete. That assumption can fail.
This guide explains How to dim high voltage LED strips safely? by focusing on electrical principles, correct component selection, and careful installation. It covers how high-voltage LED strips differ from low-voltage systems, why suitable dimmers and protective devices are essential, and which specifications—such as voltage, load capacity, dimming method, strip length, and environmental rating—should be checked before purchase. It also emphasizes compatibility between the strip, dimmer, controller, connectors, wiring, and power source to help prevent flickering, overheating, or premature failure.
Readers will learn a practical step-by-step approach to wiring and mounting a high-voltage LED dimmer, including isolating power, confirming terminal connections, protecting exposed conductors, and following the strip’s installation requirements. The guide also presents safe testing procedures, common troubleshooting steps for flickering or uneven brightness, and routine maintenance recommendations. Professional assistance is advised whenever the installation involves unfamiliar mains-voltage wiring or uncertain electrical conditions.

 Zionsville Lighting